Video: example Gridix project workflow. If you have a dedicated widget generation video, use it here.
Simplest path
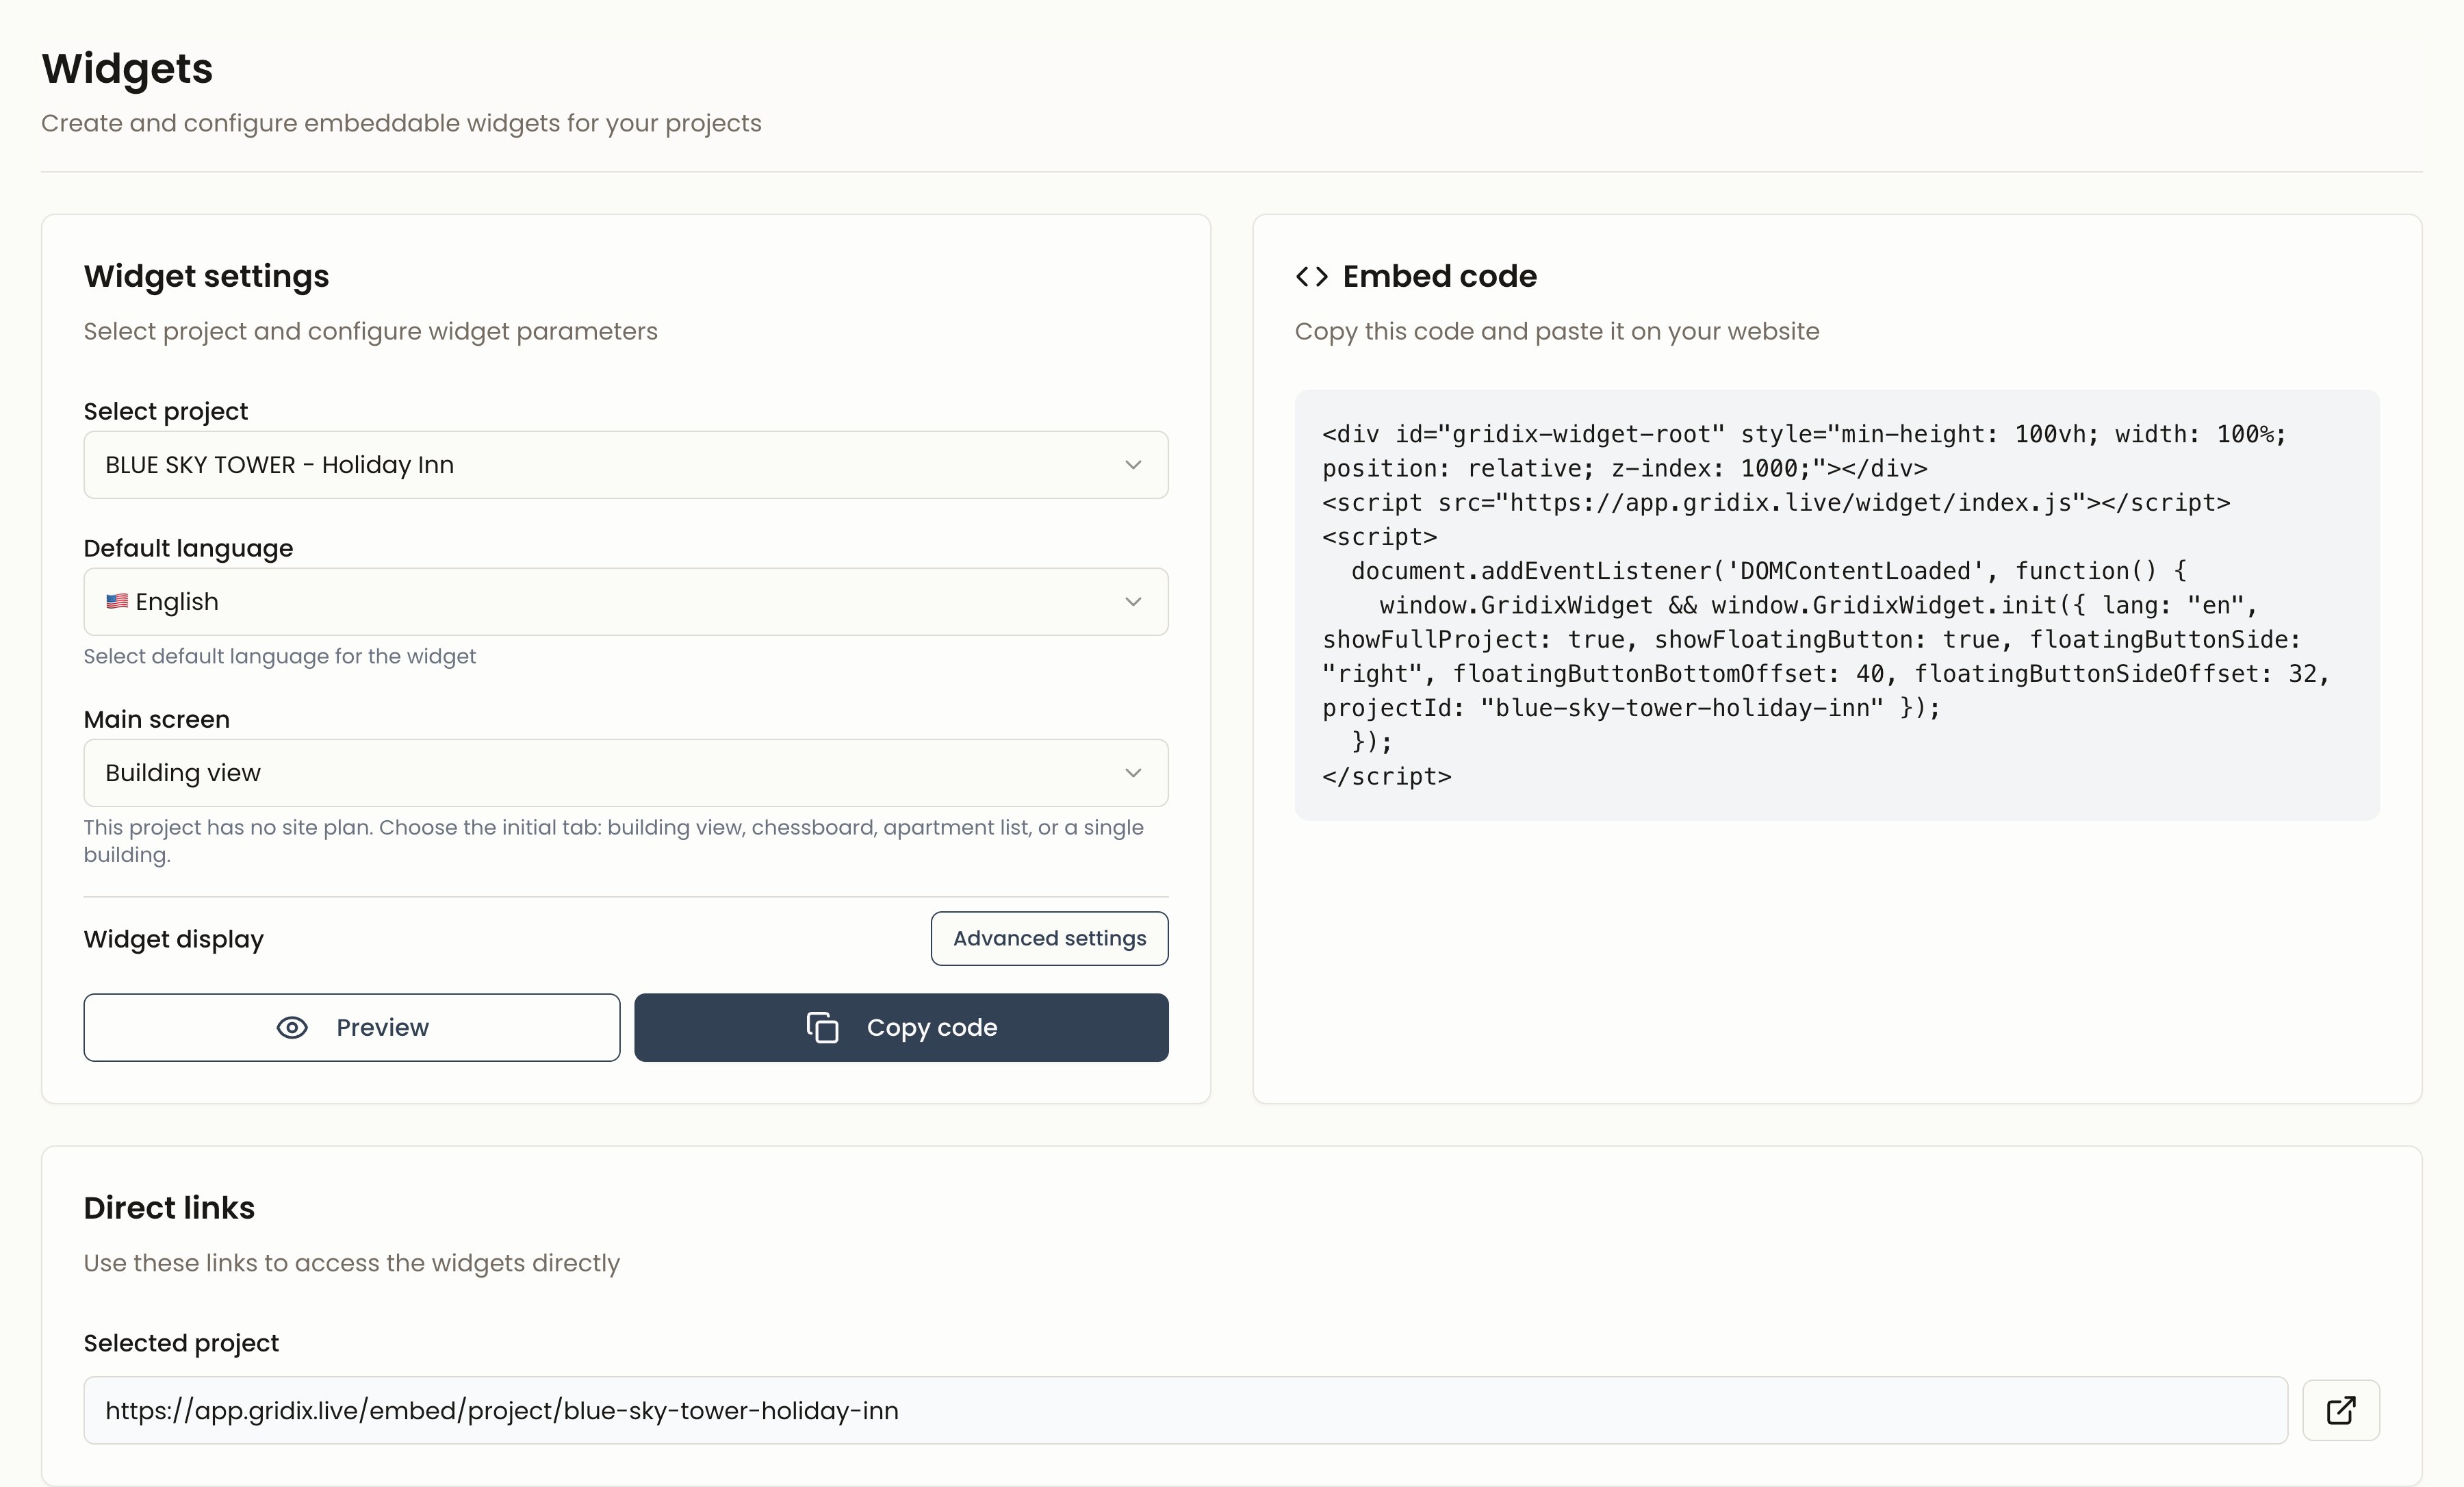
If you are setting up the widget without a developer, follow this short flow first.Generate the code in Gridix
Open the widgets section, choose the project, and select the interface language.
Paste the code into your website
Use an HTML block in your CMS or send the code to the person who manages your website.
What the widget does
The widget brings the main Gridix buyer experience into your website:- Interactive floor plans: visitors can select apartments directly on the visual plan.
- Lead collection: inquiry forms are part of the browsing flow.
- Multi-language interface: English, Russian, Georgian, and Arabic are supported.
- Responsive layout: the widget works across desktop and mobile screens.
- Brand fit: the surrounding page and container can match your website design.
Before you start
Before embedding the widget, make sure that:- the project is published and has up-to-date floor plans;
- apartments, prices, and availability statuses are configured;
- lead forms are enabled and route leads to the correct Gridix workspace;
- you have access to the website HTML, CMS custom-code block, or website developer.
Get the embed code
Step 1. Open the widget generator
Select a project
Choose what the website should display:
- one specific project;
- all developer projects.
Step 2. Copy the code
Basic embed code
- Container:
<div id="gridix-widget-root"></div>defines where the widget appears. - Script: loads the Gridix widget library.
- Initialization: passes the project and language settings.
Where to find projectId and userId
projectIdis used when the page should display one specific project.userIdis used when the page should display all projects for a developer or agency.- These values come from your Gridix workspace or from the ready embed code generated in the widgets section.
Embed on your website
- Do it yourself
- HTML
- WordPress
- CMS / no-code
SimpleUse this path if your CMS has a block for custom HTML or embed code.
Open the page in your CMS
Go to the project page, landing page, or floor-plan section where the widget should appear.
Add an HTML block
Look for a block named “HTML”, “Custom HTML”, “Embed”, “Code”, or something similar.
Settings for integrators
If you do not work with code, you can send this section to your website developer together with the embed code.What the parameters mean
What the parameters mean
lang: the widget interface language. Useenfor English pages.projectId: displays one specific project.userId: displays all projects for a developer or agency.theme: the widget visual theme, if supported by your configuration.showControlsandenableSearch: additional controls inside the widget.
Container size
Give the container a stable width and minimum height so the page does not jump while the widget loads:What to send to your website developer
If a developer or contractor will embed the widget, send them:- the ready embed code from Gridix;
- the page URL where the widget should be added;
- the display mode: one project through
projectIdor all projects throughuserId; - the interface language:
lang: "en"; - the minimum container height:
min-height: 640px; - the requirement to submit a test lead after publishing.
Minimum checklist before publishing
Check the main flow
Confirm that floor plans open, lead forms work, and the selected language is correct.
After publishing, open the page in a regular browser without CMS admin access. This checks the real visitor experience.
Troubleshooting
Widget is not displayed
Widget is not displayed
Check the script URL, the
gridix-widget-root container, the projectId, and browser console errors. A common cause is a CMS block that removes <script> tags.Widget is blank
Widget is blank
Make sure the project is published and contains floor plans, apartments, and display-ready data.
Leads are not collected
Leads are not collected
Check that lead forms are enabled, the project settings are correct, and a test form submission reaches Gridix.
Widget is too short or clipped
Widget is too short or clipped
Set a minimum container height, for example
min-height: 640px, and check the styles of the parent block on your website.Best practices
Next steps
- Project Management - Prepare projects and floor plans for the widget.
- Lead Management - Track leads collected through the embedded widget.
- Custom Domains - Connect branded domains for Gridix projects.